How Do I SSH Into Pi Over The Internet Using? A Beginner’s Guide
Ever wondered how to SSH into your Raspberry Pi over the internet? Well, you’re in the right place! In today’s digital age, remote access to your devices is not just a luxury—it’s a necessity. Whether you’re tinkering with your Raspberry Pi from miles away or setting up a home server, knowing how to SSH into Pi over the internet is a game-changer. This guide will walk you through everything you need to know, step by step, so buckle up!
SSH, or Secure Shell, is like a secret tunnel that lets you control your Raspberry Pi remotely. But here’s the twist—doing it over the internet adds a whole new level of complexity. You’ll need to set up some configurations, ensure security, and maybe even deal with firewalls. Don’t worry, though; we’ve got your back. By the end of this article, you’ll be SSH-ing into your Pi like a pro.
Now, before we dive deep into the technical stuff, let’s talk about why this is important. Imagine being able to manage your home automation system or monitor your security cameras while you’re on vacation. Or maybe you just want to tweak your Pi’s settings without having to physically touch it. SSH over the internet makes all of this possible. So, let’s get started!
What Is SSH and Why Should You Care?
SSH stands for Secure Shell, and it’s basically a protocol that allows you to remotely access and control another computer securely. When you SSH into your Raspberry Pi, you’re creating a secure connection between your computer and the Pi, even if they’re miles apart. This is super useful for managing servers, automating tasks, or just tinkering with your Pi when you’re not at home.
Here’s why you should care:
- Security: SSH encrypts all your data, so no one can snoop on what you’re doing.
- Convenience: You can control your Pi from anywhere in the world, as long as you have an internet connection.
- Flexibility: You can automate tasks, run scripts, or manage files without being physically present.
But here’s the thing—SSH over the internet isn’t as simple as plugging in a cable. You’ll need to set up port forwarding, configure firewalls, and maybe even use a third-party service. Don’t worry; we’ll cover all of that in detail.
Setting Up Your Raspberry Pi for SSH Access
Before you can SSH into your Pi over the internet, you need to make sure SSH is enabled on your Raspberry Pi. Here’s how you can do it:
Enabling SSH on Your Raspberry Pi
Enabling SSH on your Raspberry Pi is pretty straightforward. Just follow these steps:
- Boot up your Raspberry Pi and log in.
- Open the terminal and type
sudo raspi-config. - Navigate to “Interfacing Options” and select it.
- Choose “SSH” and enable it.
- Reboot your Pi by typing
sudo reboot.
And that’s it! SSH is now enabled on your Raspberry Pi. But wait—there’s more. You’ll also need to know your Pi’s IP address. To find it, type hostname -I in the terminal. This will give you the local IP address of your Pi.
Understanding Your Network Configuration
Now that SSH is enabled, it’s time to understand your network setup. This is crucial because your Pi’s local IP address won’t work outside your home network. You’ll need to configure port forwarding to make your Pi accessible over the internet.
What Is Port Forwarding?
Port forwarding is like creating a virtual door in your router that directs incoming traffic to a specific device on your network. In this case, you’ll forward port 22 (the default SSH port) to your Raspberry Pi’s local IP address.
Here’s how you can set it up:
- Log in to your router’s admin interface. This is usually done by typing
192.168.0.1or192.168.1.1in your browser. - Find the “Port Forwarding” or “Virtual Servers” section.
- Add a new rule with the following details:
- Service Name: SSH
- External Port: 22
- Internal IP: Your Pi’s local IP address
- Internal Port: 22
- Protocol: TCP
- Save the changes and restart your router if necessary.
Once port forwarding is set up, your Pi will be accessible over the internet using your public IP address.
Securing Your SSH Connection
Security is key when you’re SSH-ing into your Pi over the internet. You don’t want random people gaining access to your device, right? Here are a few tips to keep your Pi safe:
- Change the Default SSH Port: Instead of using port 22, choose a random high-numbered port (e.g., 45678). This makes it harder for attackers to guess.
- Use SSH Keys Instead of Passwords: SSH keys provide stronger authentication than passwords. Generate a key pair using
ssh-keygenand copy the public key to your Pi. - Disable Root Login: Never allow root login over SSH. Instead, use a regular user account with sudo privileges.
- Install Fail2Ban: Fail2Ban is a tool that blocks IP addresses after multiple failed login attempts. It’s a great way to protect your Pi from brute-force attacks.
By following these steps, you’ll significantly reduce the risk of unauthorized access to your Pi.
Using Third-Party Services for SSH
While port forwarding works great, it can be a bit tricky to set up. That’s where third-party services like ngrok or PageKite come in. These services create a secure tunnel to your Pi without requiring any router configuration.
Setting Up ngrok for SSH
Here’s how you can use ngrok to SSH into your Pi:
- Download ngrok from https://ngrok.com/.
- Install ngrok on your Pi and run it with the following command:
./ngrok tcp 22 - ngrok will give you a public URL that you can use to SSH into your Pi. Copy this URL.
- On your local machine, open the terminal and type:
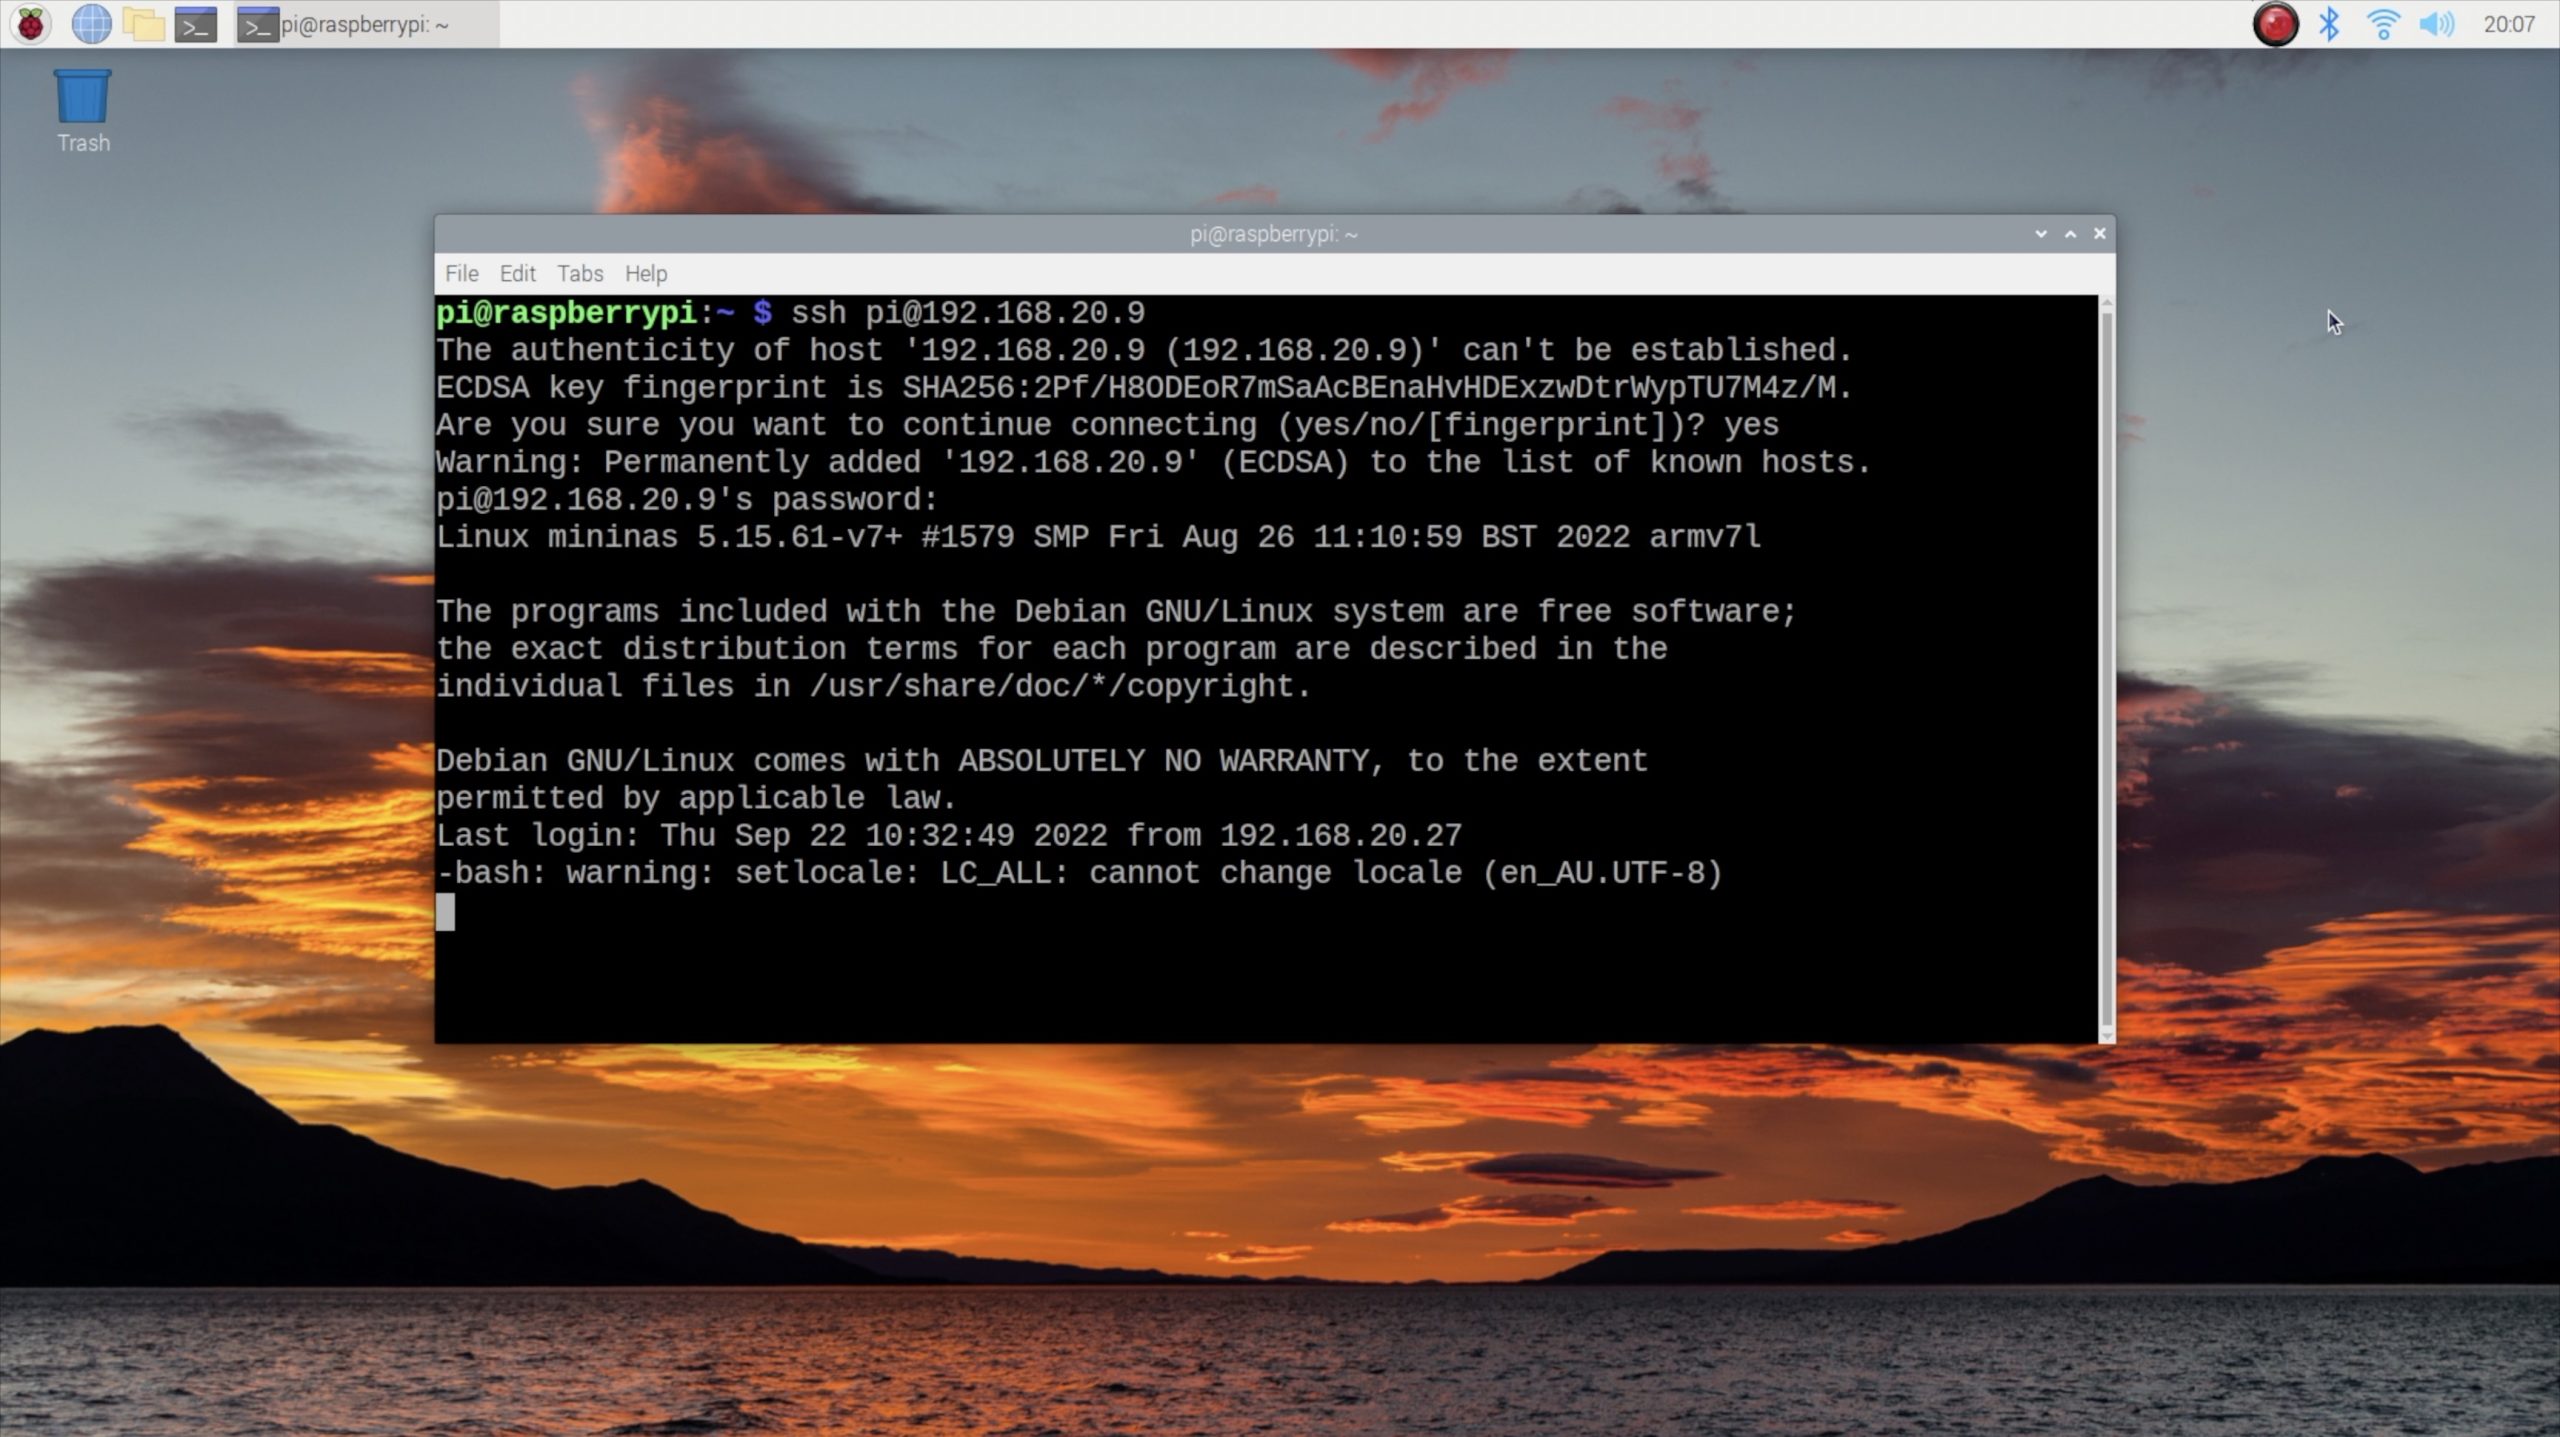
ssh -p [port] pi@[ngrok-url]
And that’s it! You’re now SSH-ing into your Pi over the internet without any hassle.
Troubleshooting Common Issues
Even with the best setup, things can go wrong. Here are some common issues you might face and how to fix them:
- Connection Refused: Check if SSH is enabled on your Pi and ensure that port forwarding is set up correctly.
- Permission Denied: Make sure you’re using the correct username and password (or SSH key). Also, verify that root login is disabled.
- Connection Timeout: This usually happens if your router’s firewall is blocking incoming traffic. Double-check your port forwarding settings.
If none of these solutions work, try restarting your router and Pi. Sometimes, a simple reboot can fix everything.
Advanced Tips for SSH Over the Internet
Once you’ve mastered the basics, you can take your SSH skills to the next level. Here are a few advanced tips:
- Set Up a Static IP Address: Instead of relying on DHCP, assign a static IP address to your Pi. This ensures that your Pi always has the same IP address, making port forwarding easier.
- Use a Dynamic DNS Service: If your ISP assigns a dynamic public IP address, consider using a dynamic DNS service like No-IP or DuckDNS. This will give your Pi a consistent domain name that you can use for SSH.
- Enable Two-Factor Authentication: For added security, enable two-factor authentication for SSH. This requires you to enter a one-time code in addition to your password or key.
These tips will make your SSH experience smoother and more secure.
Conclusion: Take Action Today!
SSH-ing into your Raspberry Pi over the internet might seem daunting at first, but with the right setup and a bit of patience, it’s totally doable. By following the steps in this guide, you’ll be able to remotely control your Pi from anywhere in the world.
So, what are you waiting for? Grab your Pi, fire up the terminal, and start experimenting. And don’t forget to share your experiences in the comments below. Who knows? You might just inspire someone else to take the plunge!
Oh, and one more thing—while you’re here, why not check out our other articles on Raspberry Pi hacks and tricks? Trust me, you won’t regret it!
Table of Contents
- What Is SSH and Why Should You Care?
- Setting Up Your Raspberry Pi for SSH Access
- Understanding Your Network Configuration
- Securing Your SSH Connection
- Using Third-Party Services for SSH
- Troubleshooting Common Issues
- Advanced Tips for SSH Over the Internet
- Conclusion: Take Action Today!
