What Does Shaggy Dough Look Like? Baking Visual Guide
Ever found yourself staring at a mixing bowl, questioning if your dough is doing what it should? Understanding the visual cues of "shaggy dough" is the first step towards baking success, unlocking a world of delicious possibilities.
Identifying shaggy dough is easier than you might think, especially with a few key visual references. The dough in its initial stages isn't meant to be a picture of perfection; it's a work in progress, a promise of the textures and tastes to come. This early stage, sometimes called the 'shaggy' stage, is characterized by a rough, uneven appearance that sets the foundation for what follows. Think of it as the messy beginning that precedes a beautiful transformation.
In the realm of baking, shaggy dough signifies the initial union of ingredientsa moment where the dry and wet components begin to coalesce. This stage is pivotal, especially in bread-making, where the rough mixture precedes the development of a gluten network, vital for structure and texture. The initial 'shaggy' stage is not about perfection but potential. It is the raw material that will eventually become something magnificent.
Let's take a closer look at the characteristics of this foundational stage in the baking process:
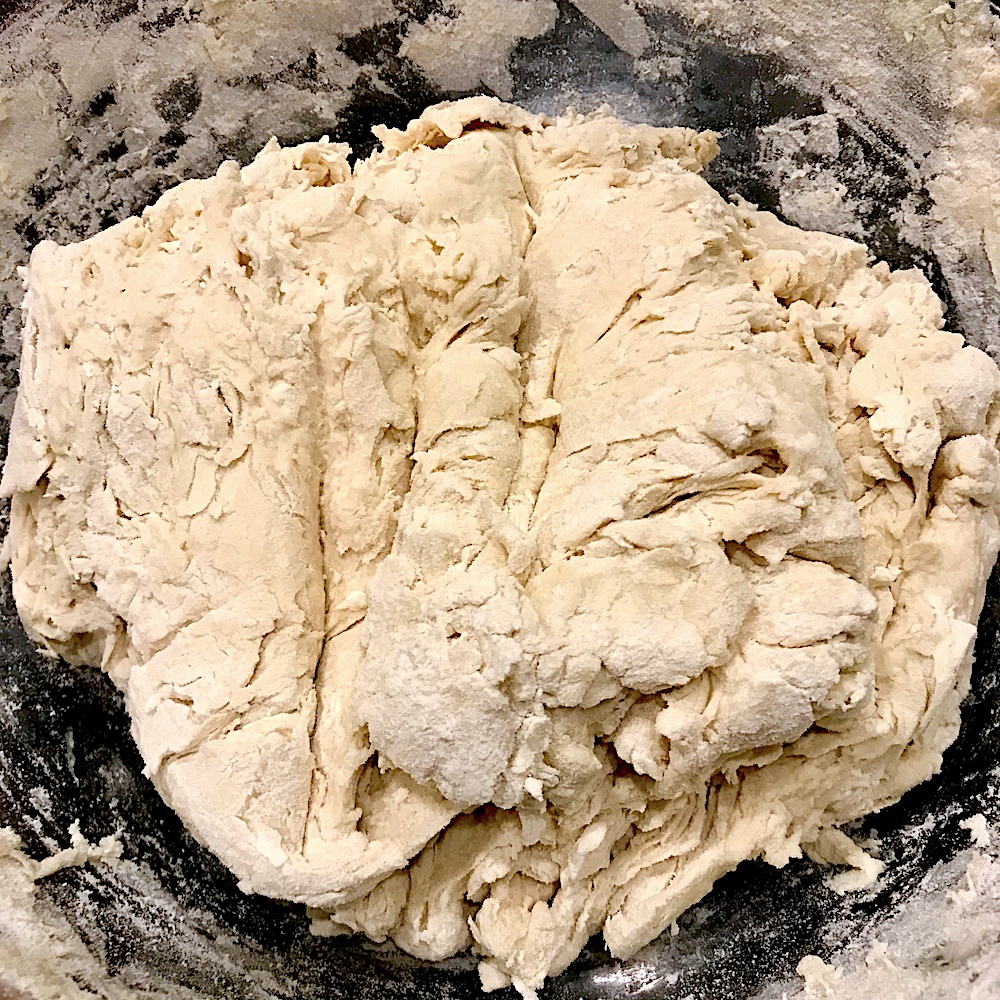
- Rough and Irregular Appearance: The dough doesn't boast a smooth surface; instead, it displays visible lumps of flour and wet spots, a clear indication that the ingredients are still mingling, not yet fully combined.
- Sticky Texture: Expect the dough to feel sticky to the touch, perhaps even clinging to your fingers. This tackiness is a sign that the hydration process is underway.
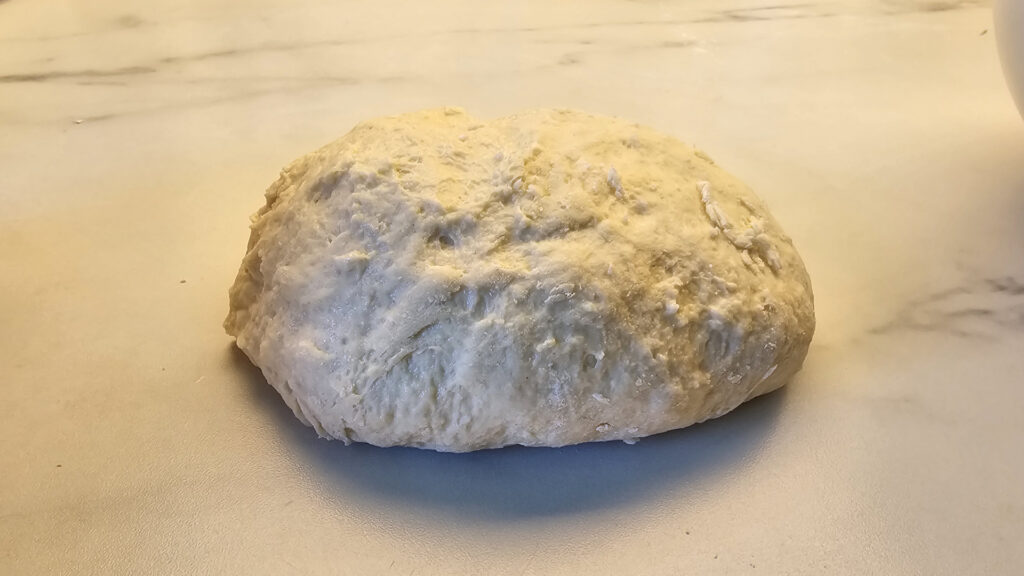
- Lack of Smoothness: The dough hasn't reached its final form; it's a cohesive ball, but not yet the smooth, elastic mass that comes later.
- Cohesive Yet Unrefined: While it forms a ball, the dough resembles the inside of a soft pillow more than a perfectly kneaded loaf. It is about texture.
Shaggy dough is characterized by a rough, uneven appearance, lacking the smooth, cohesive quality of properly kneaded dough. It often has a tacky surface, with portions of dry flour and an overall lack of uniformity. This initial state is the gateway to all sorts of baked goods, from the simplest quick breads to the most complex sourdough creations. The science of baking hinges on understanding this first step.
This stage is crucial, acting as a bridge to achieving the texture and structure that give bread its unique character. Baking, at its core, is a blend of artistry and science. The science is evident in the chemical reactions that unfold during mixing: the development of gluten, the fermentation powered by yeast, and the Maillard reaction that browns the crust.
Now, consider the practical aspects. Troubleshooting is the next logical step after understanding the underlying principles. Transforming that shaggy mass into a workable, smooth dough isn't an arcane skillit's about precision, understanding, and sometimes, a touch of intuition. A very shaggy dough in need of a set of stretch and folds, doesn't have sufficient structure yet.
Whether you're aiming for hot water crust, pita, shortcakes, or pie, the initial state of your dough matters. The goal is a cohesive ball, but not yet a perfectly smooth one. The surface is still rough. A more developed dough will be taut and bouncy, and stretching will become more difficult.
You will know when it's ready; the dough will become taut and bouncy, and stretching would not be as easy as it was initially. The dough should now look like it is coiled over itself. Rotate the bowl 90 degrees, and repeat this process until the dough does not stretch very far anymore and holds its shape. Repeat this coil fold 3 more times, resting the dough 45 minutes each time. The dough will strengthen more and more after each coil fold!
Essentially, shaggy dough is a rather loose dough that looks like a combination of a shaggy dog, a rug, or a pile of rags. Whether you knead your dough by hand or use a mixer, you can look for sure signs to identify when your kneading process is done. The goal is to transform that initial lumpy mixture into something more uniform and cohesive. This initial state is the gateway to all sorts of baked goods, from the simplest quick breads to the most complex sourdough creations.
Here's a glimpse into what you might see in your mixing bowl, along with essential considerations:
- Before Kneading Upon first mixing, your dough will look like a lumpy mess of flours. The mixture is not fully combined.
- During Kneading: As you knead, the dough will gradually smooth out. Shaggy dough is what your dough should look like when you mix the wet and dry ingredients for your sweet dough.
- Texture: The dough should feel slightly tacky and elastic, with a smooth surface. The dough should not be stuck like wetter dough would in globs on your hand. It may also have a dense, rubbery texture.
The mixing stage is not just about aesthetics; it's a scientific process. The key is to allow the ingredients to combine, and let the gluten develop. Proper mixing sets the stage for the fermentation process to take place, and the dough to expand and rise. A shaggy dough is the starting point, and the results are worth all the work.
Baking, especially when it involves understanding stages like the shaggy dough, is a perfect amalgamation of art and science. From watching the starter bubble and come to life each day, to feeling the shaggy dough become elastic and tight just from a few folds, to removing the lid on my dutch oven to see my crispy homemade loaf of sourdough bread that had cooked perfectly, to cutting into the bread to find a crumb that would have made my culinary school instructor proud, this is the art of baking.
I do an autolayze in the bowl for at least 20 minutes. Then I mix with the dough hook for about 20 minutes. At first after auto-laze, the dough looks good but will not pass a window. I mix with a dough hook for about 20 minutes on the 3rd speed. The dough should look like shaggy dough when youre done. It will not be as smooth as regular bread dough, and it will be quite sticky.
The appearance of baked pizza dough will vary depending on the type of crust and the baking method. The appearance of the dough at each stage is important for proper gluten development. Shaggy dough will stick to your fingers, and when you lift your hand, it just hangs there (moving your hand around, the pieces are affected by gravity).
When you are done mixing, you can bulk rise it cold overnight, or ball it into dough boxes for a 48-hour rise. Shoot for shaggy right out of the mixer, and you will get smooth dough later. Flip the ball of dough over and cup your hands around the dough, rotating it, and using your hands and the countertop to gently bring all the seams together for a smooth, lightly dusted finish. If you have ever heard the saying soft as a babys bottom, this is it! It feels exactly like a babys nice, lightly powdered, perfect little bum.
Below are some clues to help you know what to look for:
- Mix the wet and dry ingredients for your sweet dough.
- Look for tiny bubbles appearing on the surface and a noticeable increase in volume, indicating active fermentation.
- It should resist stretching too much, indicating the gluten is developing.
- The dough should have a pleasant, slightly sour
For the first fold, the dough will still be pretty shaggy, so only go as far as you can without ripping. Fold the dough like a letter, give it a quarter turn, and then stretch and fold once again.

